
LoadView emulates users on your website or server by performing specified actions on your website (device) like browsing, searching, adding products to their shopping cart, etc., or generating certain types of requests to your device.
Knowing how much your device can handle helps planning further software or hardware updates and to be prepared for real traffic.
You can define the number of users that will be performing these actions, the duration of the LoadView test (Load Test), and set up a fully customized scenario with the rate of arrival/departures of those virtual users.
LoadView Test Setup
To run load testing, you will first need to add (the New Test button) and set up a new load test. You can set up the following types of tests:
In addition, if you have been using Postman to test Web API performance, you can go with the Postman Collection test to set up a load test in LoadView using Web API calls from Postman. Or explore our new functionality of Load Testing with JMeter test plans – import your JMeter Test Plan and set up the test as described in the Load Testing Using JMeter Test Plans article of our Knowledge Base.
Configuring a Load Test Scenario
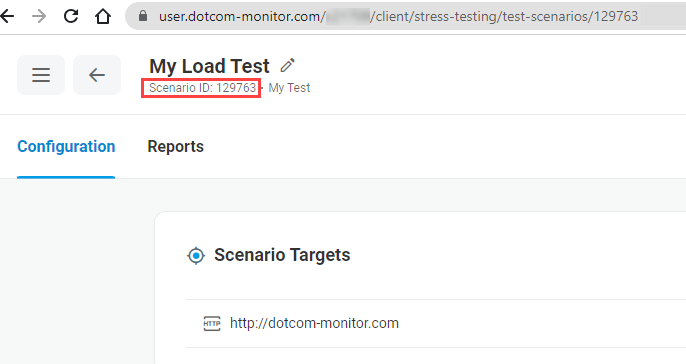
Once your targets are set up, you can configure the Load Test Scenario. Each test scenario has a unique ID displayed on the configuration page. Leverage the ID while configuring requests to LoadView API.
LoadView setup involves several steps that are explained below.
Validation
Validation verifies that the tested target is valid and requests to the target are executed without errors. Validation result status is presented in the target details section.
If the system has detected errors, click View Details to review the errors on the session report page.
User Behavior Profile
The profile describes simulated user behavior on a website during test execution. To customize simulation of user interaction with a website, see User Behavior Profile.
Choosing Load Type
Load Type allows you to select between different types of load tests. Each type has some specifics that define what it is best to be used for, available settings and test results.
You can choose among the following load types:
- Goal-Based Curve verifies if your website complies with the predetermined throughput (transactions) by automatically adjusting the number of simulated users. For detailed instructions, see Setting up Goal-Based Load Test.
- Load Step Curve allows setting manually a specific number of concurrent users (requests) by specifying ramp up/ramp down rates and time. For detailed instructions, see Setting up Load Step Load Test.
- Dynamic Adjustable Curve allows adjusting the number of concurrent users (requests) manually in real time during test execution. For detailed instruction, refer to Setting up Dynamic Adjustable Load Test.
For more help on how to pick the load type, see Choosing Right Type of Load Test.
To emulate virtual users, we launch Load Injector Servers (LI) that, in turn, will run virtual users. The Payload setting sets the number of those virtual users that will run on each LI. High payload affects the LI CPU usage and can lead to invalid tests results due to LI overload. On the other hand, a large number of LIs used for the test increases the test cost. Thus, it is important to set the optimal payload value.
You can adjust the Payload value manually but it is recommended to run device calibration and apply the value suggested by our system on the calibration results.
Depending on whether the target website is available or not from the public Internet, select a type of locations to send the load traffic from.
Do Not Use Network Proxy if your website is available from the public Internet. All load traffic will be sent from the LIs with randomly allocated IP addresses. Herewith, each Load Injector will have its own unique IP address.
If you need to test a website behind the firewall, you can allow load traffic from specific IP addresses that you can open your firewall for. To do this, use the Public option. The load traffic will be sent from Load Injector Servers with dedicated IP addresses. Find the list of the static IP addresses here and whitelist the IPs to your firewall. Learn hot to use the Public proxy option in the Testing Behind a Firewall with LoadView Static Proxy Server article.
If the target website is not available from the public Internet and you can not open the firewall for specific IPs, use the Onsite Proxy Agent option. LoadView Onsite Proxy Agent can be installed inside the same network as a target website. Herewith, the load traffic will be sent from within the local network.
Load Injector Geo Distribution
You can select the geographic location of LIs and, in turn, the allocation of virtual users between different geographic locations to better match your traffic distribution. To test behind a firewall, consider the Public Network Proxy option.
Summary
Load test summary is located on the right sidebar of the test scenario page and provides a quick overview of your Load Test settings and a price quote based on the test configurations. If you want to adjust anything, you can go back to the section you want to change and edit the settings. If validation failed, fix errors before starting the test.
The Load Test price is calculated based on the following values: the cost of virtual machines required for the test, the test duration, and the number of virtual users simulated during the run.
TOS
Please read the Legal Agreement and accept the terms by checking the checkbox and typing your name. Note that LoadView tests that cost more than $500 will require phone verification by providing your mobile phone number and entering a confirmation code sent to the number you’ve provided. LoadView tests that cost more than $1,000 will require voice verification over the phone by our support staff that will call a specified number.
Run
On the Start Load Test pop-up, you will be prompted to provide your email in the Email Notification section (optionally) to receive a notification on the test completion and select the start mode. A load test can be started immediately or later at a specific time (up to 24h).
For the tests with a postponed start time, the option of concurrent test execution is also available.
Once you have run the test (immediate start), it will start within 10 minutes (up to 1 hour depending on the region selected).
While the test is starting it will go through a sequence of statuses that are explained below:- Submitting Test Request – sending your test settings to the server to run.
- Initializing.
- Scheduled – the test is waiting to run at the specified time.
- Starting Load Injectors – we send cloud providers a signal to set up the required number of virtual servers and deploy virtual users. This step can take a lot of time (up to 1 hour) and it is recommended to provide the email to receive an email notification once it’s complete.
- Sending Execution Plan – we are sending LoadView scenarios and tasks to LIs.
- Running – once the test is running, you will see the charts with LoadView metrics updated in real time, including the number of visitors, the number of errors (if any), device response time, etc.
- Processing Data – once the test is over, we upload all the responses from the virtual server to our server and display those responses for a more detailed analysis and review. The data retention time is 365 days for the paid version and 31 days for the trial. Please note that this step can also take some time since LoadView tests generate a lot of response data.
- Finished.
The system notifies you with the corresponding message on the Load Test Report page after the test is completed.
Load Test Results
To pull the test report from the Test Scenarios manager page, select Reports from the Actions menu or from the quick action menu for the corresponding test instance. You can also find your test report in the list under the Reports menu on the left sidebar (see Reviewing Load Test Results).
-
Web Performance (Load and Stress) Testing with LoadView
As a rule of thumb, website performance testing should include:
- Load Testing
- Stress testing
Load testing of a website or web application is a type of performance testing when a large number of users simultaneously make requests to the same web resource. Load testing helps to find out if a web application can handle peak loads without losses in its performance.
Stress testing of a web application is performed to achieve a site or web application failure by increasing the load and to assess the limits of a web application’s performance. To stress test a web application, the load level is significantly higher than the operational load of the web app. Stress testing is usually used to check the web app’s response to stress and the way it recovers from the failures.
In general, load testing includes the following steps:
- Setting load testing goals and requirements.
- Picking a load pattern.
- Setting up a test environment.
- Choosing a load testing tool/stress testing tool.
- Creating a load test scenario.
- Executing a load test/stress test.
- Result analysis.
First, before you start setting up a test environment and looking for load testing tools to use, you should decide what exactly you want to receive as the result of your test. We recommend you pay attention to the following questions:
- What level of load do you expect to have on a target web application? For example, how many visits your website must handle per hour without performance degradation. See how to translate your web analytics to concurrent users here.
- What level of performance do you need to have depending on the load level? For example, the response time of the target web server, the average time to load a web page, the load time for web elements, etc.).
- How would you describe the conditions your website will be used in? Will a target website be available from the Internet or it will be available from within the local network only? What are the geographical regions the requests to your website come from? What is the most likely type of network throttling? Will your web resource be used by real users in a browser window or by third-party applications via API?
- How often do you need to execute load and stress testing? In other words, you should decide how often you are going to roll out updates, change web content and web server configuration.
One of the most important questions to consider while load testing is the performance of your web application in real-world conditions from a real-user side. Let’s have a closer look at modern web applications and explain why it is not enough to use HTTP-level load testing to test interactive web applications.
Load and Stress Testing Web Applications in Real Browsers vs. HTTP Level Load Testing
A web application is a web-based application that has a client-server architecture. As a rule, a web browser is a client, and a web server is a server.
A web application runs on a web server. Generally, the web server’s side is responsible for the business logic of the web application – the way it reacts to client requests. It receives HTTP requests from a client, processes the requests, and sends back the corresponding responses to the client.
In its turn, the client’s side renders the data received in the response from the server to deliver it to the user in a graphical human-friendly form. Once the response from the server has been received, the browser (the client) processes the data included in the web server response. HTML, CSS, JavaScript technologies are the most frequently used in web development to implement modern web pages. Thus, to deliver the information to a user in a browser window, the web browser not only renders HTML content but also executes JavaScript and uses CSS to present the data in a proper way.
There are two widely used approaches to perform automated load and stress testing of web applications – HTTP-based testing and real browser-based testing.
The first HTTP-based approach allows web developers and QA engineers to emulate HTTP requests directly to a web server (backend) without interacting with a web app’s graphical interface that real users see in the browser window (frontend). Generally, the HTTP-based load testing approach requires some technical background and coding experience to simulate a real-life use case with several transactions on a website. On the other hand, it does not require a lot of resources to simulate a heavy user load.
Quite the opposite, the browser-based approach simulates real user interaction with the web app’s frontend to create a realistic test scenario. In this case, multiple copies of a web browser are instantiated to automatically perform user actions in a browser window. Since it requires more server resources to run multiple browser copies on the load injector machine it is recommended to use cloud-based services for websites and web applications load testing online.
Considering the frontend-oriented nature of modern web applications, load testing your backend only is not enough to fully cover all the performance issues that can occur under the load. Moreover, such type of web application as single-page applications, so-called SPAs, fully rely on JavaScript executed by a web browser and cannot be tested properly without running the browser.
Load testing websites in real browsers allows you to check a website functionality on the client’s side, verify that web page content was loaded and functioning correctly including text elements, images, RIA elements, and web forms. Browser-based load testing and stress testing approach allows you to simulate real user interaction with a web application and make sure that your users will not experience any losses in web app performance during high traffic periods. Also, running a load test in a real browser allows you to check a web app for the correctness of the content display and functioning under heavy load in different desktop and mobile browsers.
LoadView Solution for Online Load and Stress Testing
LoadView is an online cloud-based solution for website load and stress testing. It is a reliable tool for web developers and software testers to set up and run tests of any website, including business applications, web portals, APIs, online streaming media, or web services. The tool supports load testing of RIA applications with dynamically changing content, SPAs, websites that are not available from the public Internet, etc.
Testing in the cloud. Modern websites and web applications are distributed systems that are often located in the clouds. To load test such websites LoadView uses Load Injector Servers from Amazon and Azure cloud services. It allows users to carry out load and stress tests with a large number of virtual users accessing a target web resource simultaneously. LoadView supports testing from 20+ worldwide distributed geographical locations to make test conditions as similar as possible to your potential user profile.
Load testing behind a firewall. In the case of load testing websites protected by a firewall, LoadView offers load and stress testing from Load Injector Servers with predetermined IP addresses. Thus, you do not need to open your firewall for all incoming traffic, you just need to whitelist the LoadView Public Proxy IP addresses to run a load test.
Load testing from within your local network. LoadView offers the LoadView On-site Agent software to load test websites that are not available from the public Internet. The On-site Agent software can be installed on the local computer inside a company network. It performs connection from inside the company network to the LoadView service and uses this connection to receive load traffic from LoadView Load Injectors. Herewith you do not need to open your firewall for any incoming traffic.
Load and stress testing in a real browser. Besides HTTP-based load testing, LoadView supports load and stress testing in real browsers. Using LoadView you can emulate virtual users accessing web apps from 40+ different desktop and mobile browsers in accordance with your test requirements.
Easy to create test scenario. LoadView uses the EveryStep Web Recorder tool to record a load test script in a browser window. With the tool, you can create complex load tests without using any coding that can be run across several desktop and mobile browsers. The script can be customized with the built-in code snippets to add network filters, user delays, response modifiers, etc. In addition, to secure passwords and personal information of another type while script recording, LoadView offers the Secure Vault option. Using the Secure Vault option, you can store sensitive information that is used in the recorded load test script in the encrypted form.
Validation of web page content. Sometimes it is not enough to be sure that a target web resource is available and web pages are loaded while load testing. If you need to make sure that the web page content was loaded without errors and dynamic web elements are functioning correctly on the page, you need to use content or RIA validation. While recording a script of the web application load test or configuring an HTTP-based load test, LoadView allows you to set up keyword validation to validate text content on the page. Image validation, as well as RIA elements validation, are offered in the EveryStep Web Recorder tool. Select a necessary keyword or an image on a page and the system will check if the element is loaded correctly while the load test run. In case of errors detected upon validation, the corresponding record will be added to the load test report.
Simulating real user behavior. To provide realistic results of web pages and website load testing that correspond to the actual website performance LoadView offers the User Behavior option. Using the Maximum Speed user profile allows you to stress the target web server by simulating HTTP requests to the server as fast as possible. To reproduce real user experience on a target web resource the Normal User profile is recommended. You can set a custom delay between user actions on the website to create a load scenario as realistic as possible. The system will add user delays between “navigating” and “go to” actions. Thus, the HTTP requests to the website will be generated in a pattern that is close to the operating conditions of the target website.
If you are recording a script for web application load testing, you can use user behavior settings in the EveryStep Web recorder tool. You can specify such parameters as mouse move speed, mouse click, and text type speed as well as set delays between script steps.
Various load patterns. With LoadView you get three types of the load pattern:
- Load Step Curve
- Goal-based
- Dynamic Adjustable Curve
Depending on your load test goals you can use the corresponding pattern to find your website breaking point, simulate user load during traffic peak hours, check compliance with SLA and non-functional requirements, etc.
Load Test Reports. Load testing results are presented in a visual form in the form of load test session reports and charts to allow you to analyze the performance characteristics of a target website under a load of different levels. Using the reports, you can identify and eliminate bottlenecks that can create problems in the daily operation of the website and optimize the configuration of your hardware and software. The following load test results can be found in the reports:
- Execution plan with the number of virtual users emulated per time interval.
- Average response time calculated per time interval.
- The number of executed sessions including sessions with errors and sessions executed successfully.
- Cumulative session count including the total number of successful sessions and sessions with errors.
- CPU load metrics registered on LoadView load Injector Servers to verify load test results.
- Session reports with detailed element-by-element waterfall charts and reference videos (for a web app load test execution).
You can download load test summary and raw data reports to your computer.
Subscription plans. LoadView lets you start stress testing your website for free by giving out $ 20 in credits that you can use for on-demand testing. This amount allows you to run a couple of simple tests with default parameters. To continue using the solution with customized parameters, you should sign up for a monthly or annual subscription or proceed with an on-demand package paying for each test as it runs.